


未来如果项目上因为升级或者迁移,想要在BTP或其他时候打印Adobe表单时,却发现以前开发的表单对象是Smartform,就需要把Smartform转换为Adobe From。所以本篇笔记主要记录如何将Smartform转化为Adobe Form。
Smartform转为Adobe Form
一、介绍
未来如果项目上因为升级或者迁移,想要在BTP或其他时候打印Adobe表单时,却发现以前开发的表单对象是Smartform,就需要把Smartform转换为Adobe From。所以本篇笔记主要记录如何将Smartform转化为Adobe Form。
二、操作步骤
1.SmartForm
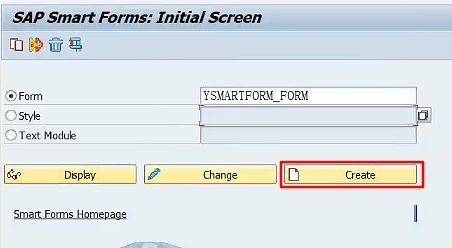
(1)创建 Form对象
使用事物代码 SMARTFORMS 打开创建界面。填入Smartform的名称后点击 Create 按钮。
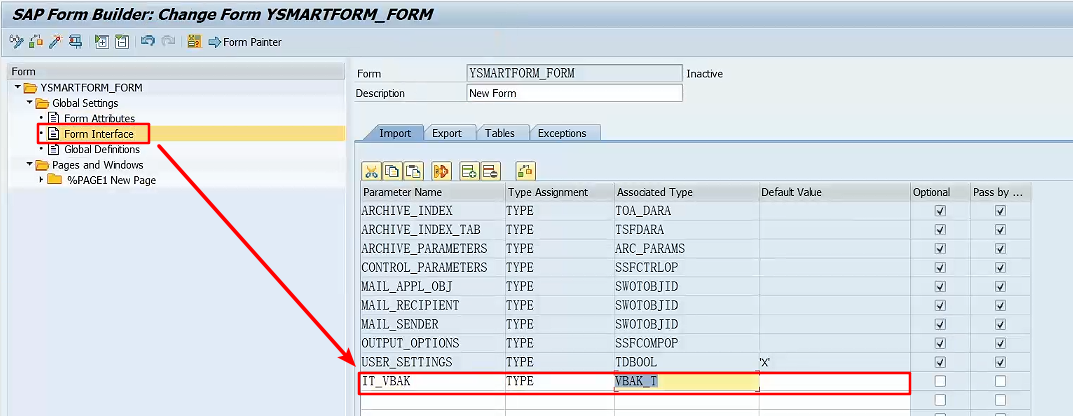
(2)添加输入参数
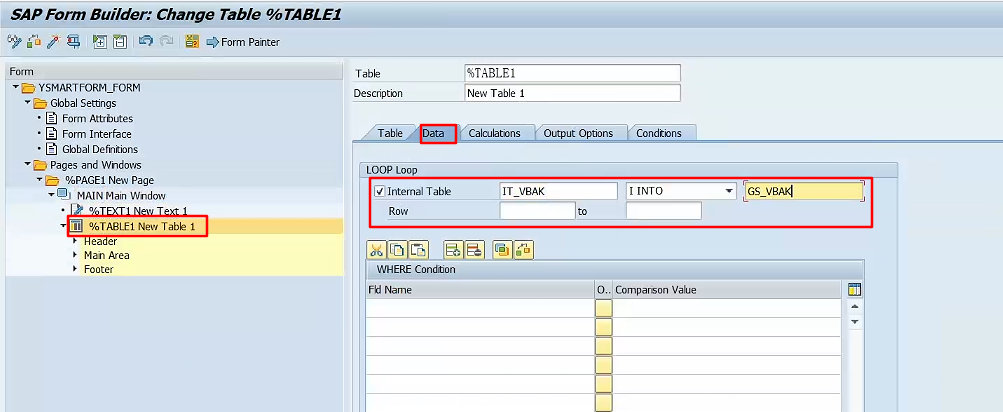
在Form Interface页签中添加输入参数。用于在Form中展示此参数传入的内容。
1 | IT_VBAK TYPE VBAK_T |
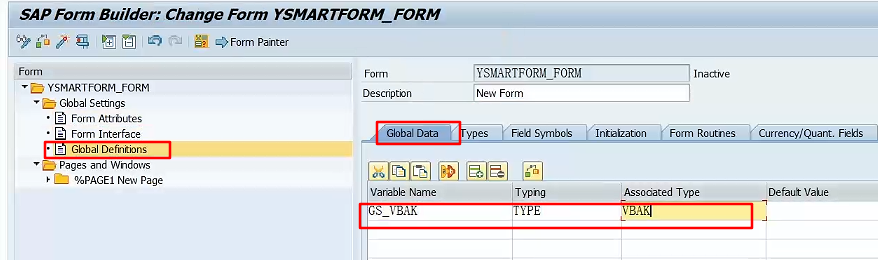
然后在Global Definitions页签中的Global Data中添加一个输入参数的结构体变量。用于遍历输入参数的内容。
(3)设置主页面
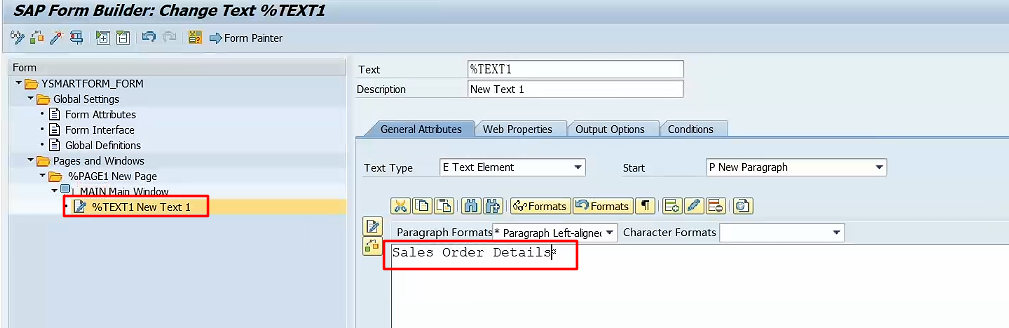
① 添加文本对象
在主页面下新建一个Text对象。
② 添加表对象
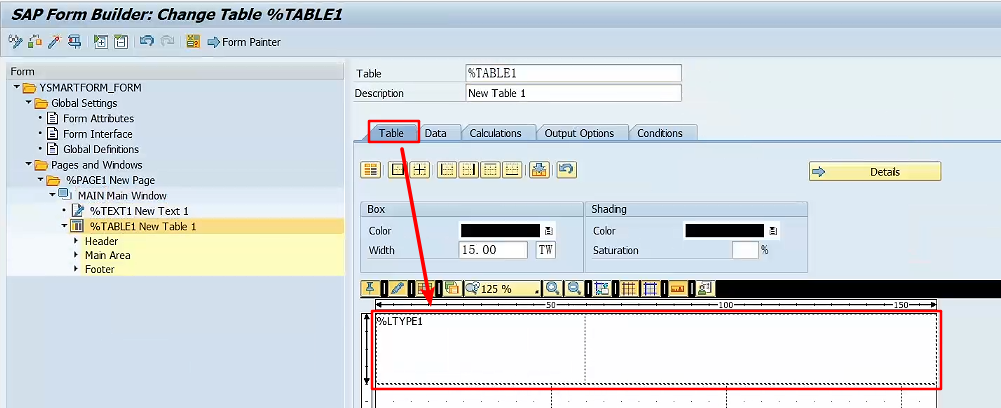
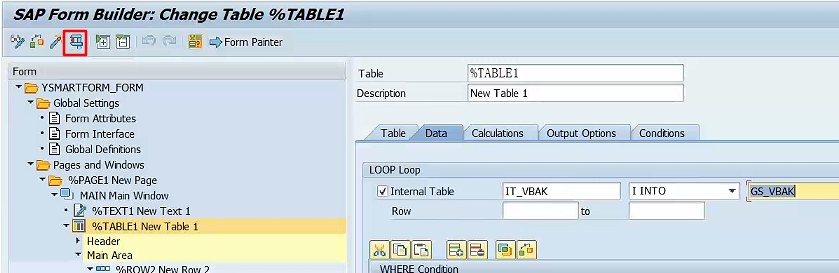
新建一个表对象。并设置其数据页签。
点击Table 页签,设置表对象为两列。
③ 设置表头
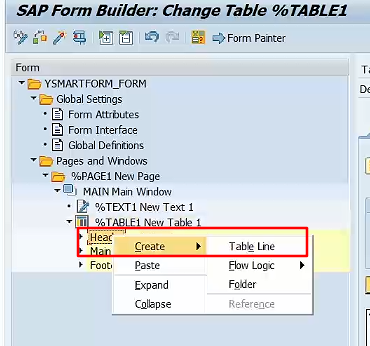
在Table对象下的Header页签上右键,新建一个表行。
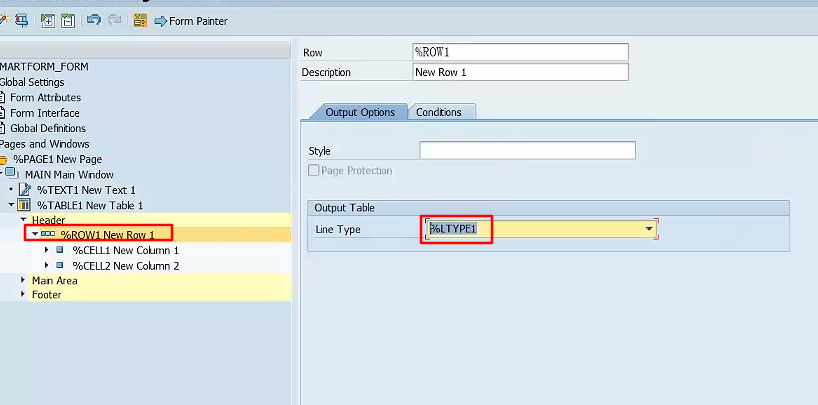
新建完成之后选择行类型为 %LTYPE1。
在两个Cell对象下各新建一个Text文本对象并写上对应的列名。
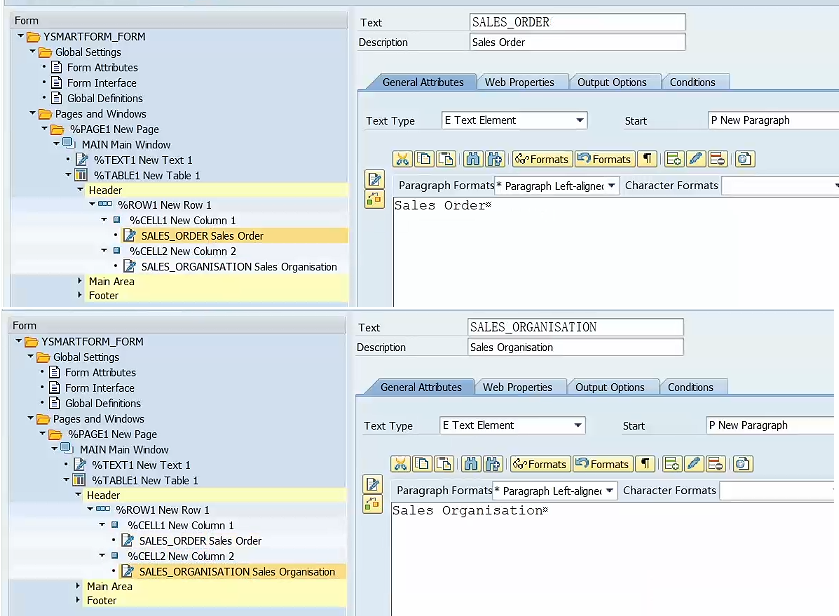
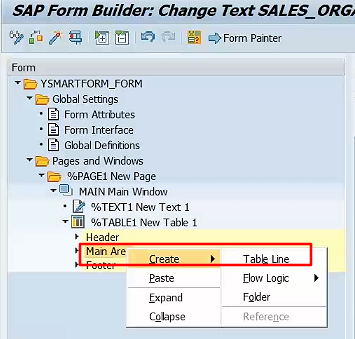
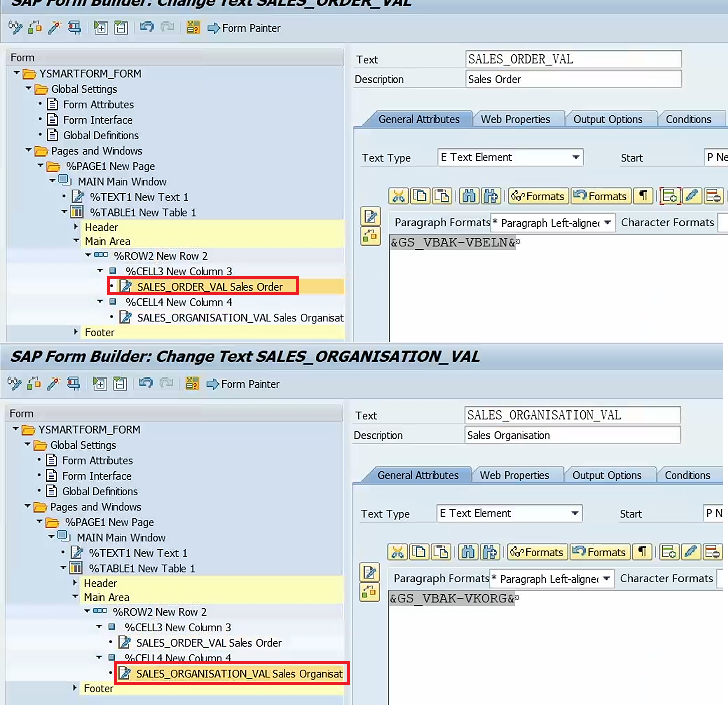
④ 设置主要区域
和上面创建表头的操作一样,在Main Area上右键新建一个表行,类型同样是 %LTYPE1。然后在对应的Cell下新建文本对象,并将全局变量的字段填入其中。
然后保存并激活Smartform即可。
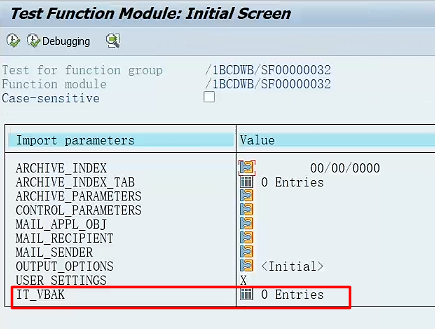
(4)Smartform测试
直接在编辑界面运行Smartform。
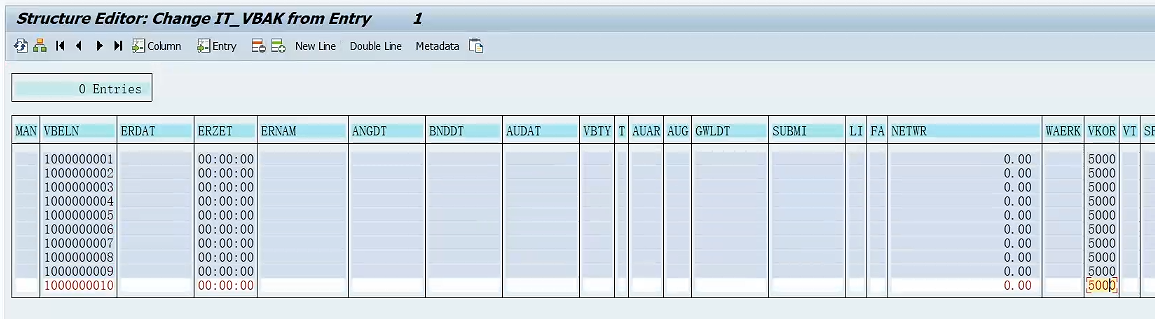
参数界面如下所示。
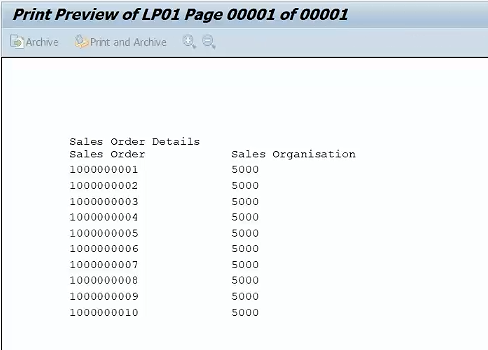
执行的结果如下所示。
2.转换为Adobe Form
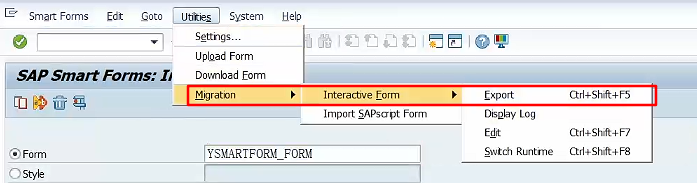
(1)转移步骤
在Smartform界面按照 Utilities —> Migration —> Interactive Form —> Export。
(2)填写Adobe Form名称
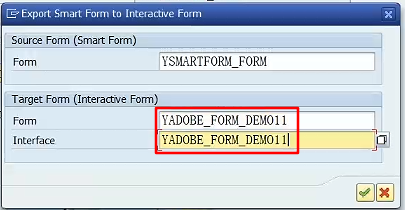
点击对勾按钮会进入下面的界面。
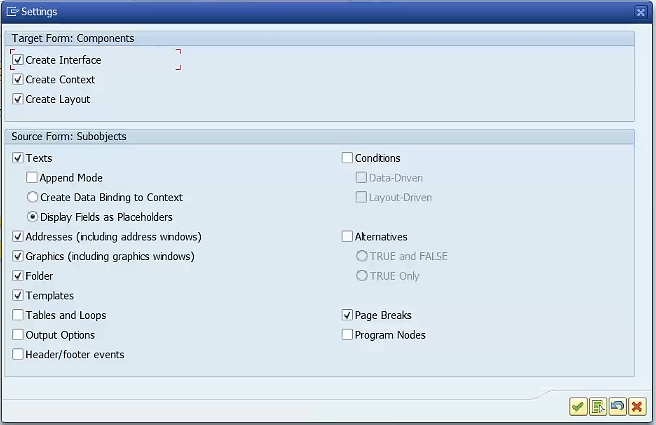
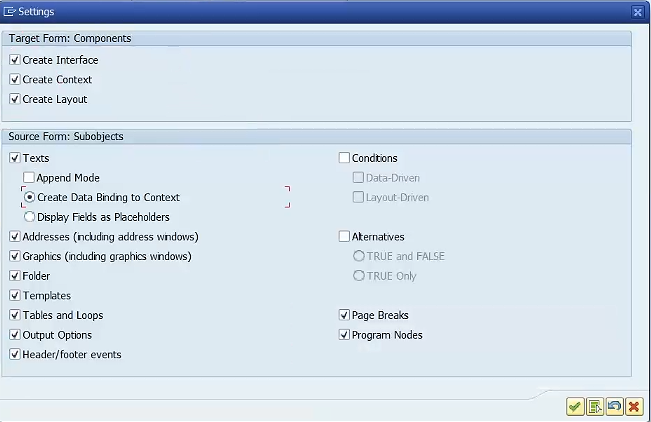
选择所有所需的复选框。然后点击对勾按钮,将转换的Adobe Form放入对应的Package中。
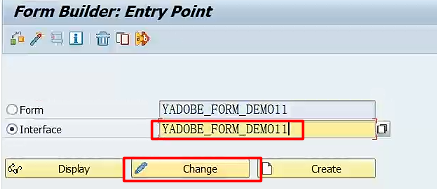
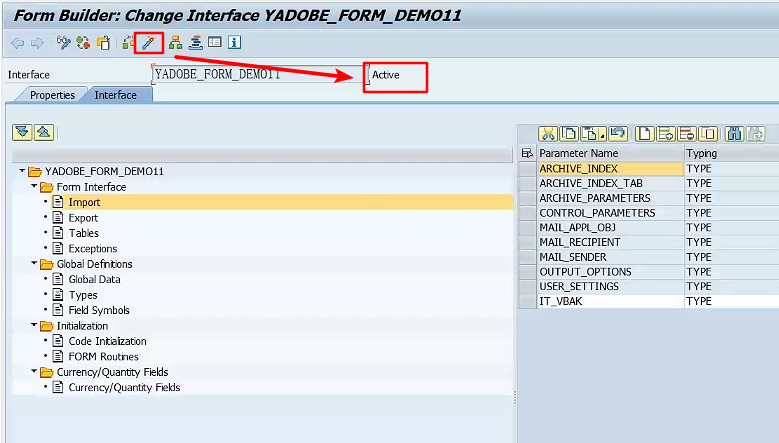
(3)激活Interface
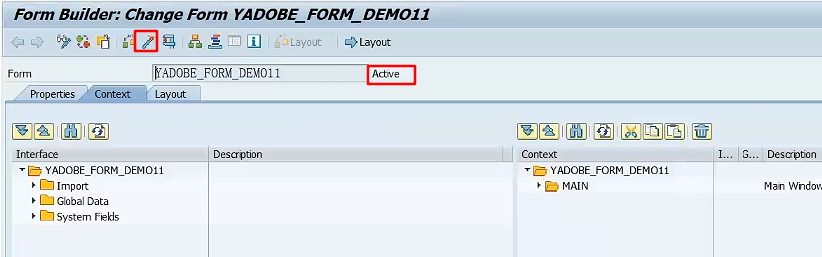
使用事物代码 SFP 打开Adobe Form界面,在Interface一栏输入刚刚填入的Interface名称,然后进入编辑界面激活该对象。
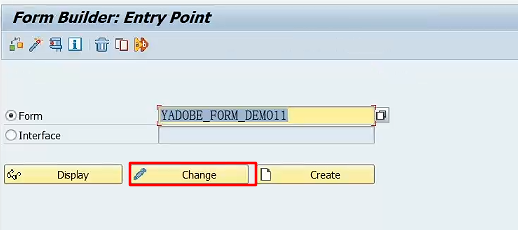
(4)激活Adobe Form
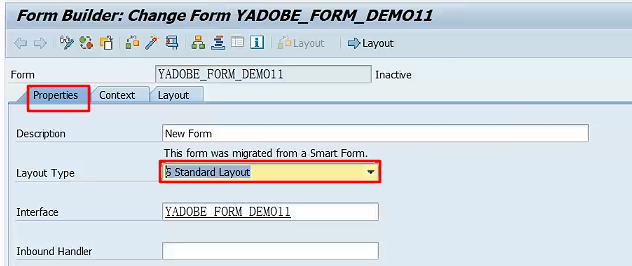
使用事物代码 SFP 将刚刚Adobe From的名称放入其中点击编辑按钮,进入Adobe From的编辑界面。
点击Properties 页签,修改Layout Type为Standard Layout。
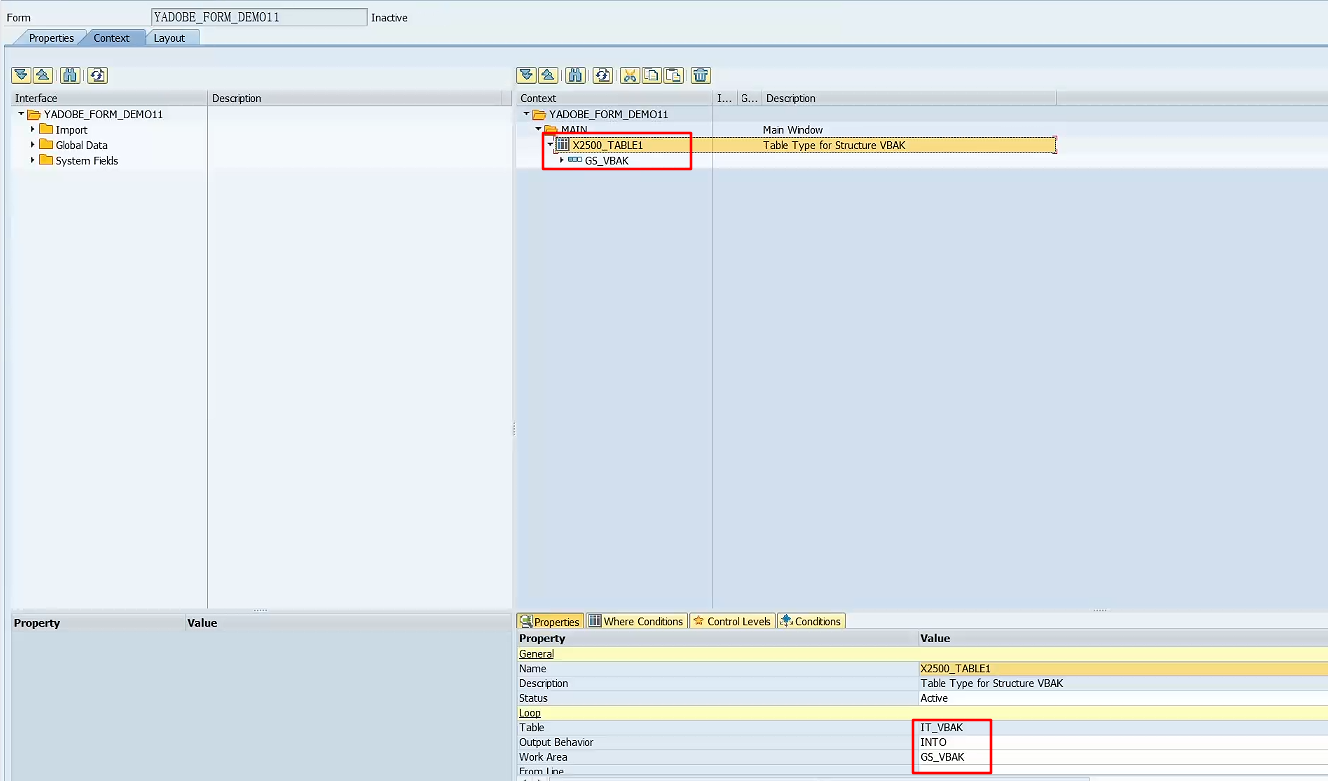
转到Context列表检查参数等内容是否均复制成功。
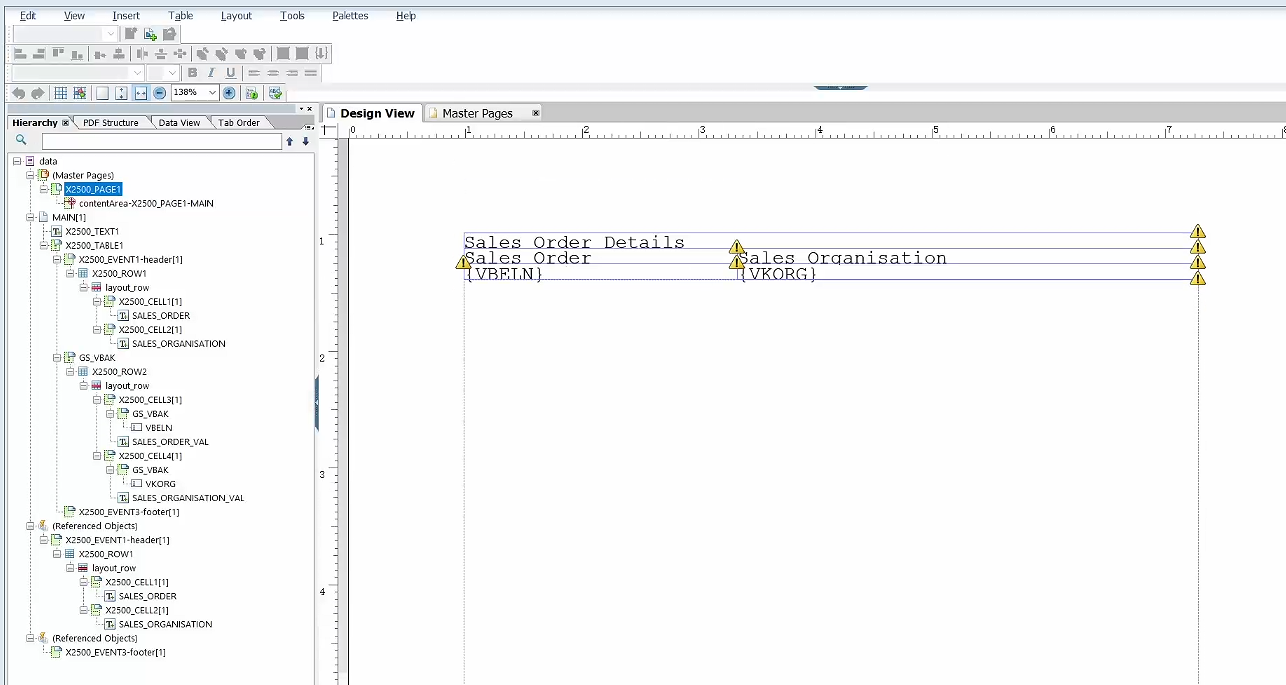
转到Layout页签,查看转换的Form内容。
最后激活Form对象。
三、测试Form
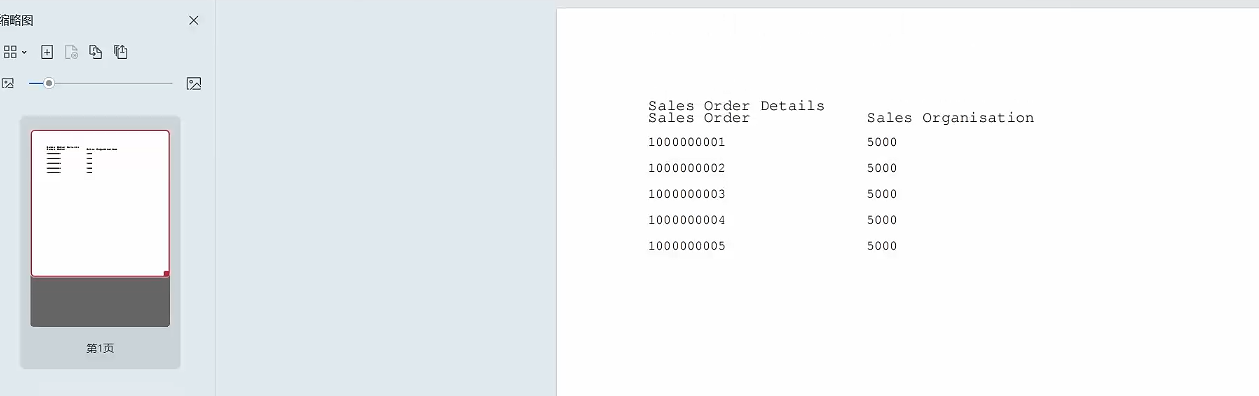
运行激活成功的Adobe From。
执行结果如下所示。
四、参考资料
SAP Adobe Form Tutorial. Part XII. How to Convert Smartform to Adobe Form?